Restored Early Stanley 9 1/2
September 3, 2013 8 Comments
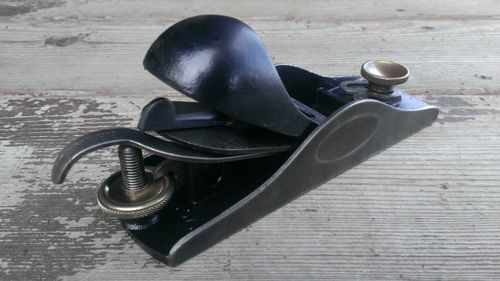
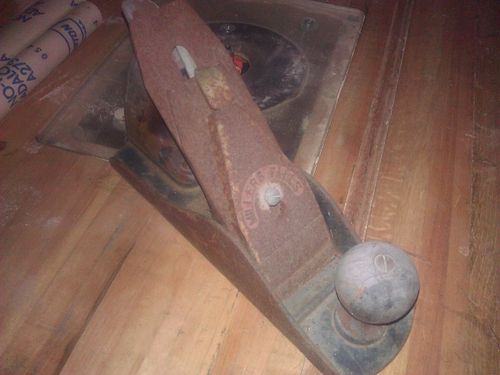
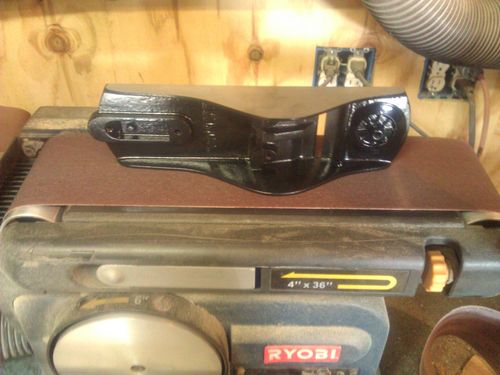
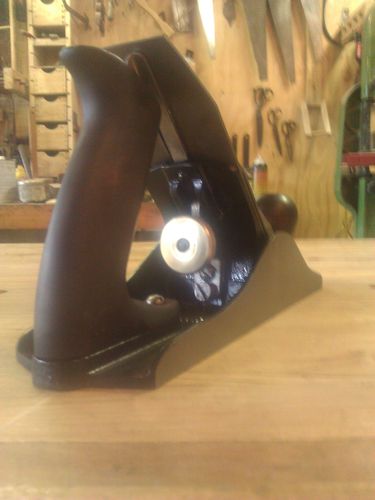
A type 10 Stanley 9 1/2. I date this plane somewhere between 1898-1904.
As bought


After restoration.


Tools and Woodworking for fun
September 3, 2013 8 Comments
A type 10 Stanley 9 1/2. I date this plane somewhere between 1898-1904.
As bought
After restoration.
June 22, 2012 Leave a comment
I bought a Handyman #3 (or so I thought it was a handyman #3) for $3.75 off eBay. I started stripping it today and as it unfolded I became a bit confused. Having never had a Handyman before, it took a while to sink it. I have what appears to be a type 5 – #3 with a handyman cap and a type 10 or 11 v shaped logo iron. SWEET.


Some past knob and tote creations.


Or how about a set of Cherry totes for a #5


How about Some Maple


April 9, 2012 Leave a comment


Here is the before shot.

March 27, 2012 Leave a comment
A transitional bench plane can be a pleasure to use and they just look really cool. I’ve restored several, and each one tends to bring on a new challenge. Its a restore of wood and metal parts. Its not that hard to transform these into fine performing tools that are pleasing to the eye.


First thing I typically do is take everything apart and place the parts in a container. I will often be restoring more than one plane at a time, and it is easy to start forgetting what part goes with what plane.

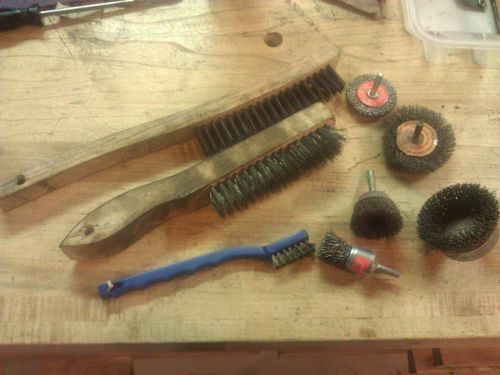
Its not that uncommon to have the parts rusted together. I typically wire brush as much of the rust off as I can. Some parts, like the cap iron, can be wire brushed to completion. Other parts, such as the frog will often have moving parts that you don’t want to try to take apart (like the lateral adjustment) and dips and hollows hard to wire brush. These go into evapo-rust. (For more option for removing rust, see my blog on bench plane restores) Also, after some time in the evapo-rust, the parts should come apart easier.


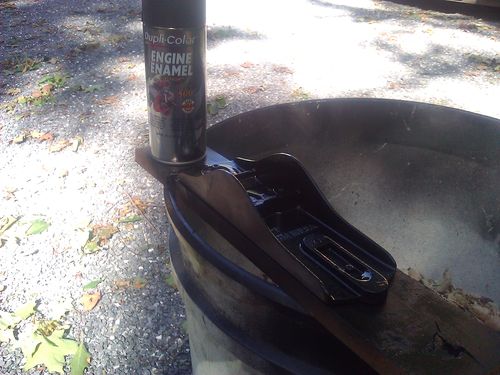
The base will get the same treatment as the bench planes mentioned above. It is easier however to wire brush the base of a transitional without to much head ache. I will often wire brush them instead of setting up the sand blaster. I then paint the needed parts with Dupli-Color Engine Enamel DUPDE1635 Ford Semi Gloss Black spray paint.
Note: This assumes it needs stripping and painting. You need to decide, but if the japanning is in reasonable shape, it may be best to de-rust and oil, and leave it original.


All of the parts shown above are brushed with a course brush. When dealing with the brass parts, switch to a fine brush to avoid removing to much brass.

I also find the dremel brushes can help in these situations

I will the put a piece of rag over the piece and chuck it in the drill press. Depending on what is needed, I’ll sand the inside (inside only, and never if it has writing) up to 500 or 800 grit.


Give the iron and cap iron the same treatment as described in the bench plane blog buy ensuring a tight bond between the cap iron and the iron and polishing the chip breaking section. A cap iron blog is here.

After cleaning up the iron, give it a good sharpening.
Now off to the wood parts.
Restoring wood parts of a plane are the same as almost any wood restoration. If you have a favorite way, it probably can be incorporated.
I typically use a cabinet scraper on the bigger pieces first.

I then sand, some power, some hand sanding as needed.


Depending on the severity of the dryness, I will often soak the ends in BLO. I flip from end to end every so often and coat the entire plane. Once its removed, a complete wipe down to remove the excess.


Its not uncommon to need knob and tote repairs. Again, this is just typical wood restoration. I typically use Brownells Agraglass gel. I have used it in my gunsmithing hobby and know it works well. Any epoxy would work, and many just use glue, although I’ve seen glue not hold on the oily woods like rosewood. Also many times the break is old and hard to get really clean.

For a tip replacement, we’ll sand to get a good clean and flat surface.

then we’ll find a suitable piece. I typically don’t try to match. I’ve found it difficult to match the color and grain of such a wide variety of wood used.

Prepare it

Mix the epoxy. I like to add dye to color the mixture.

And typically with this type of epoxy, no clamping is required. Another big plus. Just be careful, when you walk away it will tend to slide if gravity has its way.

To sand the knob, (after repairs if needed) I have a bolt with the head ground enough to slide into the counter sunk hole, and will chuck it in the drill press.


Sand to 500 grit.
The knob gets the same treatment. I may soak them in BLO, or just coat, depending on condition.
And finally start the re-installation.

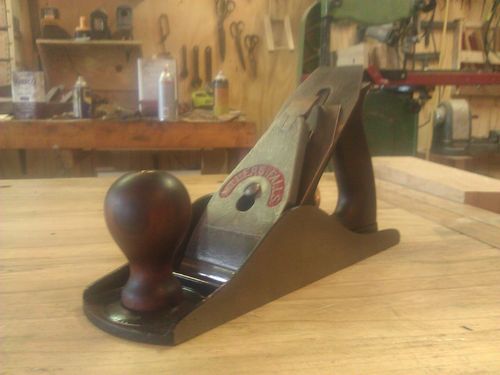
So the before and after shots of the 2 I restored for this blog.
An Upson #29


—After—


Sargent #3415. I don’t have a before pictures of the second. The reason. It looked so bad I didn’t think it was restorable. Yep, even I didn’t think it had possibilities. I planned to use the frog for another one of the High angle planes I planned to save as much of the base for future repair pieces. As I started scraping and sanding, this began to emerge.


The cap iron and iron are pitted so bad the iron will never be usable. I even tried the ruler trick but the pitting is to deep. I decided to paint the cap iron to hide some of the pitting. It will be a show piece until I stumble onto a new iron.
March 15, 2012 Leave a comment
Updated and moved to http://www.timetestedtools.net/2016/01/27/ohio-tools-planes-and-some-history/
I had the fortunate coincident to pick up a Ohio Tools #6 and #7 bench plane a few days apart. I took this as a sign. Someone was telling me I needed to put together a few more of these wonderful bench planes. The hunt is one.
What intrigued me the most was the different style frog adjustment screw of the #7.


The #6 Does not have a frog adjustment screw, but the other thing I like about the Ohio Tool bench planes is the style of the tote and the large low profile front knob.
Here is the #7.


the #6.


The #5 soon to come


November 23, 2011 1 Comment
This has moved to the web site
http://www.timetestedtools.net/2016/01/26/bench-plane-restoration-guide-part-1/
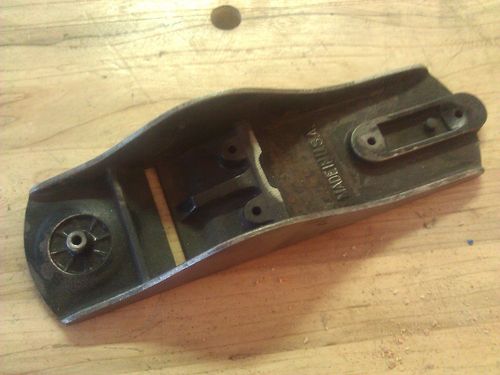
So, I bought this bunch of planes in this pile which is shown with all the other weekend finds. Included at the bottom of the pile was this Millers Falls #10.

I figured since this plane needed almost anything a plane restore could need, I would expand on it a bit and talk about my methodology for metal bench plane restoration, because when I pulled it from the pile it looked like this.

First i should note that you may find the occasional picture from another plane restore. I’m not trying to trick anyone, just get the details in and I can’t guarantee i have all the pictures I need from the Millers Falls #10. Most of my planes are Stanleys, but I have to admit I have a sort of soft spot for the good Millers Falls planes. Maybe its because they are the underdog, or maybe its the brighter shinier metal that I usually have to strip because its flaking away, either way, here we go.
First I take it all apart and put the parts in a plastic container. That to keep all the parts together as best as i can. I tend to have multiple projects happening in my shop, and since I don’t do this for a living, its possible i don’t get back for a few days or a week. I don’t want to have to remember where I put the parts. I then stand for a minute to contemplate what to start on first. The decisions are usually based on mood more than a real process.

Lets talk about the japanning. I’m a firm believer in leaving the japanning on an older plane if its reasonable. It could increase the value of the plane, but a lot of the planes I find the japanning is shot. Determining what to do next will take some trial and error if you’ve never done it, but here is what I use.
If your not going to repaint, its a good idea to give the japanned areas a couple of coat of shellac. This will bring back a bit of the luster and help protect both the japanning and any bare metal where the japanning is gone.
Electrolysis. Its a a great process and will get rid of the rust, or at least make it easy to brush off. I have used it and I will continue to use it at times. The draw backs are this. It takes a little time. You need to get it set up and it typically takes over night for most planes. You need a plastic container big enough for the piece your de-rusting and you need a battery charger. I will guarantee once you’ve used it you will continue if you plan to do this often. See Al’s blog for further instructions.
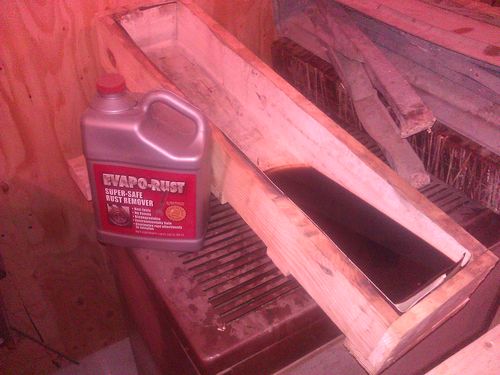
Evapo-rust. Sold at some Tractor Supply’s and internet sites. Its $20 a gallon so its more expensive than electrolysis. A gallon will do a quit a few plane and other tools though. Just set the piece in it and let it set over night. Again the rust will either wipe off or wire brush right off the next day. I wire brush my parts first, just to make the evapo-rust last longer and try to keep it cleaner.
Sand Blasting. My favorite for planes that you know you need to paint. I bought a $30 sand blasting gun at amazon.com and haven’t looked back. Again, I try to leave the japanning if I can, but if it needs painting this is the way to go. Screened play sand will work just fine, but I bought some aluminum oxide blasting grit which works a little better. Don’t be afraid to stick with the play sand for a while. Its does a fine job. The draw back of sand blasting is you need a decent air compressor.
Black Diamond Blasting Abrasive
EDIT: I’ve noticed recently the sand blasting guns are even cheaper at Amazon.
The old fashion way. Wire brushes and scrapers and screw drivers and sand paper and whatever else you have to work the stuff off. This is the hardest way, but if you plan to only do one or two, it may be your choice.
Paint Stripper. Paint stripper will work if added to “the old fashion way” above. It will usually take a few applications. I have used it but for me its messy and time consuming. Again, if you are only going to do a few planes, it may a choice.
This is what the Millers Falls looked like when it came out of the evapo-rust. I had hopes I could save the japanning, but there was to much rust under the japanning that I didn’t see until it was lifted.
I knew it needed to be painted, so lets break out the sand blaster.
I also created a small blasting cabinet. You can re-use the media and it keeps it contained. Plus it doesn’t get all over my shop.

Note most of it is plastic except for a piece of glass in the front. That’s so its easier to wipe off and see through. The bottom is open so I set it on my bench on a flat piece of steel (plywood would work too) to catch the sand. Note the 2 hand holes in the front. What you can not see is the top. I have 2 holes drilled in a piece of plywood. One is for the air hose. The other is for a shop vac. When using play sand for media, it helps to suck the dust out so you can see.
It takes me 30-40 minute to setup and clean a base using the Sand Blaster. Obviously doing 2 or 3 at once is quicker.

Take a look at my #8c restore for more picture of before and after sandblasting.
Edit. I upgraded my blaster. See the blog.
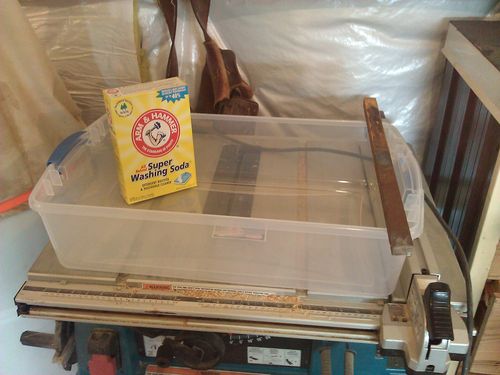
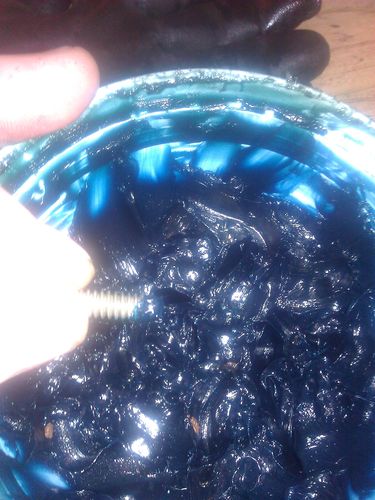
To use evapo-rust, you can use a plastic tote like the electrolysis, or I made an aluminum tray out of flashing material. Its narrower so it takes less to cover the plane. I can also tilt it in one direction so its deeper on one end.
VERY IMPORTANT NOTE. MAKE SURE THE WHOLE PIECE IS COVERED. EVAPO-RUST WILL LEAVE AN ETCH MARK AT THE WATER LEVEL THAT WILL NOT EASILY COME OUT!
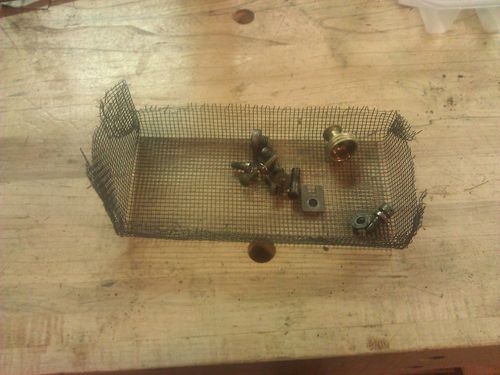
I also made a wire basket for the smaller parts.
Next you will want to wire brush the frog so you can paint them together. I don’t have a picture wire brushing the frog, but you will want a course and a fine wire brush like this one:
There is usually a little hand work on the frog as well. I have some larger and smaller wire brushes I use. Use what ever works for you. I also have a collection of wire brushes for the drill. I will use whatever works.
It’s typically easier on the frog to tape off the areas to not be painted. If the base hasn’t been cleaned up I don’t bother, but If I have the rest of the base complete, I’ll mask it with painter tape.
Next paint it. Wipe it down with mineral spirits or paint thinner to get all the dust off it. I use Dupli-Color DE1635 Ceramic Ford Semi-Gloss Black Engine Paint – 12 oz.
spray paint or Rust-Oleum Hammered Black paint. I find the Dupli-Color to be a little closer to the original finish. What I like about the Dupli-Color Engine Enamel is you re-coat after 10 minutes. I usually let it sit for 15 minutes and add a coat. I will give it 4 or 5 coats. Note you can not re coat if you wait longer than about 1 hour though. If it starts to set up the fresh paint will cause the semi dry paint to peel and curl up. If you need to repaint wait 7 days as described on the can.
A lite masking off what’s not to be painted helps save some time.


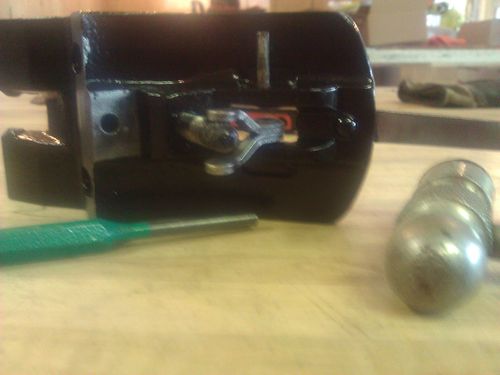
I try to paint the frog and base together just to save time.
I may take the fork off if it comes apart easily. I paint the fork as well.
Next Polish the sides of the base. I use a belt sander, but have done a few by hand sanding.
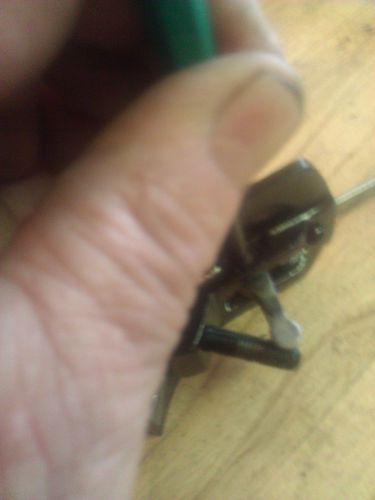
Flatten the frog. File the frog flat. It really doesn’t matter if you do this before or after painting. I usually wind up doing it after. I lock it in a vise and hold the file flat while filing it. It doesn’t need to be perfect. Some like to polish this as well, but its not really necessary.

Check and fix the cap iron. First thing I do is wire brush it. It should be re-rusted by now with whatever you decided, or you can just wire brush it. I find I will wire brush it first, then throw it in the evapo-rust if It still needs a little help. You can also touch it to a belt sander to shine it up a bit if needed. I go into more detail here.
Sharpen it After cleaning up the iron (just like the cap iron) you’ll need to sharpen it. How I go about that process is described here.
Now for the wood. I chuck the knob in the drill press.

Sand it with 60 grit if it still has a varnish or hard finish. then up through 500 grit. If it had an oil finish I’ll start with 220 grit. First few coats of BLO
goes on with steel wool while in the drill press. If the existing finish is hard, it is usually easier to scrape it first.
For the tote, I haven’t found an easier way than possibly scraping if its a hard finish, and sanding as you would any other piece of wood.
Finish the wood with boiled linseed oil
(BLO). If its a really dry old piece, soak it in the BLO overnight.
If you need to make a new tote.
If you need to fix a broken tote
For the adjustment knob, I wire brush the outside. I try the fine brush first, if its bad enough you’ll need to start with the course, just be careful, you can take the ridges off. Then I chuck it in the drill press. I will add a piece of paper towel or rag between the jaws and the knob to protect it. Just tighten it hand tight. I then rip some pieces of sand paper about 1/4” by 1” and sand the inside. If its bad I’ll start with 120 grit up to 500 grid.
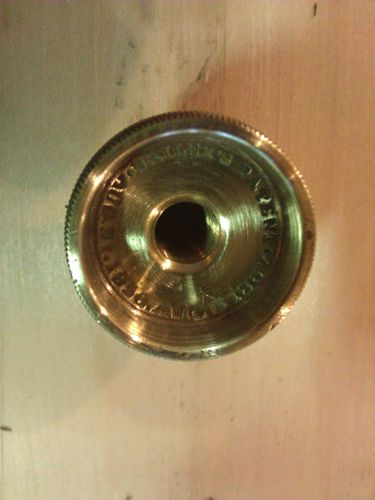
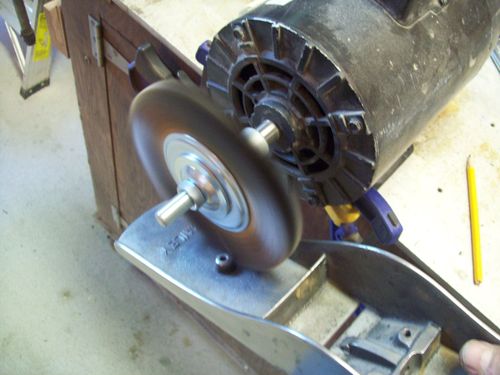
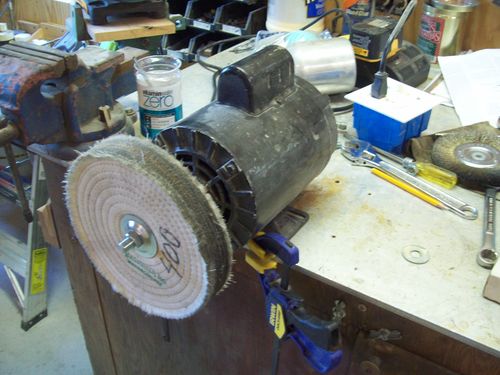
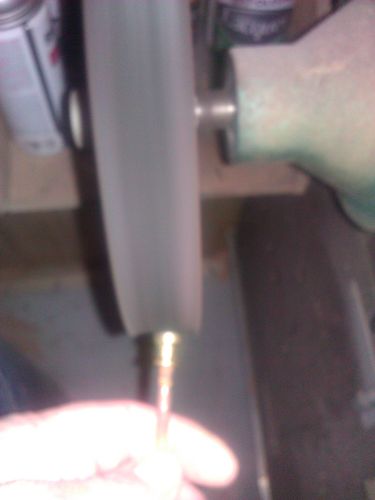
The brass nuts that holds the knob and tote on will go straight to the buffing wheel.
Cap Irons get wire brushed. I usually leave it with the brushed look. This Millers Falls was chromed, but it was shot, so I took it right off and left it. I painted this one on a Solar.
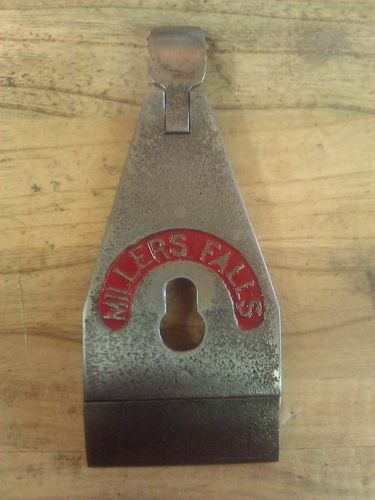
To get the red background, I will mask the outside outline, paint it, let it dray and sand it with a sanding block. 220 grit, 320 grit, and 500 grit works for me.
Next flatten the sole. I don’t have a piece of granite yet, so I’m still doing it on the table saw top. If it proves to be real bad, I’ll start it on the belt sander, like I do the sides, but I always finish it on the flatter surface of the table saw. Turn the plane front and push in all directions to keep it flat and even.


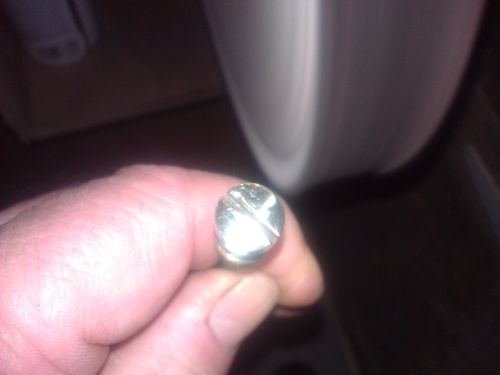
Wire brush all the remaining screws and washers. I typically add a little axle grease before putting the screws back in.
As I’m putting everything together I give it a coat of Fluid Film
to keep the rust away.

Or Wax it

And a few more “After” pictures.
For more information, check out the links on my reference blog.


