Page 2 – Some Before and After Pictures (My Restores)
Page 3 – Some Before and After Pictures (My Restores) - Page 2 – Some Before and After Pictures (My Restores) – Page 1 – Some Before and After Pictures (My Restores)
Fulton 107


Another American Boy 


and an American Boy family picture


Does anybody have information on the American Boy? Who made it? When?
Sargent #207 Block. Needed a new knob, so it got some cherry.


#4. Every one should have a painted black and white. Even the nuts, bolts, frog and everything else was painted. I think it was house paint to.


After 


Sargent #15 more here


After 


Stanley #130
Before 
And after. I had to turn a knob. I had a piece of wenge just about the right size, so wenge it was.


Type 17 Stanley #4
before 

Now


Sargent #415
. The Sargent# 415 is like the Stanley# 5 1/2 size. (blog here https://timetestedtools.wordpress.com/2012/09/09/sargent-415/ and here http://lumberjocks.com/donwilwol/blog/31991
–


Note the condition of the knob and tote. They obviously needed replacement, and I wanted something other than rosewood. I decided on bloodwood. A lot of Sargent’s came with Mahogany, but I didn’t have any available. I thought this was a suitable replacement. And Of course I never make one at a time.


The japanning was shot as well, so it needed to be stripped and repainted. As with the #708 and all my repainting, I used Dupli-Color Engine Enamel DUPDE1635 Ford Semi Gloss Black spray paint


Sargent 307 type 2


And here is what it look like now;


Sargent 306
Before 
Now 


Sargent Knuckle
Before


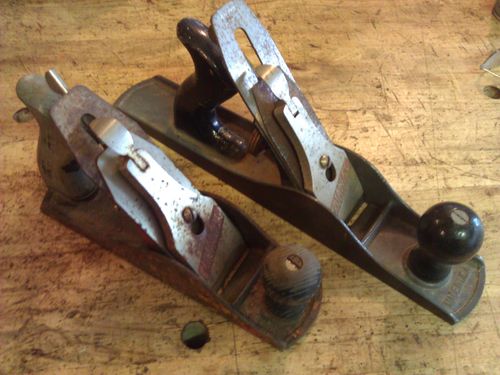
I had some time in the shop yesterday. Here are 2 Handyman planes I picked up. A #4 and a #5. The #4 was repainted, the #5 is original. I don’t repaint the knob and tote very often, but I did on these.
Before 
After 


An Orange handled #5. I think it may be a Defiance.


After


S4 before


After 


Stanley Type 11 #4c
Before


After


Was bought on ebay as a handyman #3


As I started stripping it and as it unfolded I became a bit confused. Having never had a Handyman before, it took a while to sink it. I have what appears to be a type 5 – #3 with a handyman cap and a type 10 or 11 v shaped logo iron. SWEET.
Just find a cap of the right vintage, and now it looks better.


Millers falls #14b


So basically what I’ve done to this is glued a piece of bloodwood to fix the tote, sand and refinish the knob and tote, stuck it in evapo-rust over night and sharpened it.


Page 3 – Some Before and After Pictures (My Restores) - Page 2 – Some Before and After Pictures (My Restores) – Page 1 – Some Before and After Pictures (My Restores)
