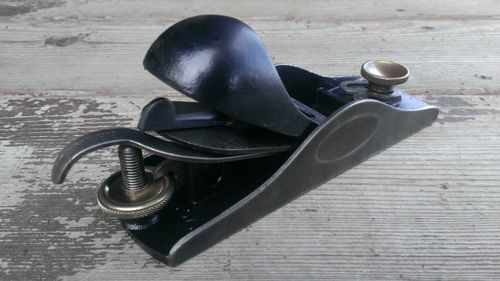
A type 14 Stanley #5C restored.

I don’t have any before pictures, because this beauty came with a type 20/21 frog with the folded lateral, so I wasn’t even going to do anything with it. I changed my mind more just to see how much work it would take, since it was a jack anyhow, I figured it would be ok. I thought it was strange that it had rosewood, but I didn’t think to hard on it.

On closer inspection though, I found this wonderful type 14. Based on the broken tote tip, I would say it was dropped and the original frog busted.

I had the correct frog, so its all back to normal now.

I didn’t do the tote repair, its an old repair which seems very solid. I just sanded it out and refinished, leaving the history intact.

IMG_20141220_140732035_HDRIMG_20141220_140740560_HDRIMG_20141220_140807777_HDRIMG_20141220_140816664_HDRIMG_20141220_140918158

Check out my tools for sale…..

Some Before and after pictures of a Type 2 Stanley #18

See more of my block planes here.

IMG_20141115_142835989IMG_20141115_142826083_HDR


And After

IMG_20141127_095417553IMG_20141127_095428365IMG_20141127_095509807

And a recent Stanley Knuckle Plane Family Shot

10435463_830086703710398_8988417750538471327_n

Stanley #65 type 1 restoration

See my other block plane post

This is a recent restoration of a type 1 Stanley #65. According to Virginia Tool Works this would have been manufactured in 1898 through 1900.


IMG_20141018_124945301IMG_20141018_124955362_HDRIMG_20141018_125004311IMG_20141018_124842676


Most folks are more familiar with the later type #65 with a knuckle cap and adjustable mouth.

The knuckle cap actually didn’t start until 1913.

The adjustable mouth came about in 1905.


WP_20130928_027WP_20130928_028

My June #5 restore

A recent restore I thought I’d share.

The before

WP_20130824_006

And as it is for sale

AfterRestore2AfterRestore1


And if you haven’t done so already, please take a look at the new web site.

dw

Restored Early Stanley 9 1/2

See my other block plane post

A type 10 Stanley 9 1/2. I date this plane somewhere between 1898-1904.

As bought

After restoration.

A Stanley #45 resurrected.

“What in the world was I thinkin”? My $7 #45 came, but man was it rusty. This will be the first restore I’ve done that required a massive amount of fire. Even after soaking some of the parts for 2 days in evapo-rust, it still took a hefty flame to convince them to come apart.


And me, trying to get it apart. Is it hot in here?


Only broke one bolt, and still managed to get the remnants of that out.

But after soaking, wire wheeling, making a new cherry knob and tote, its back together. I haven’t tested yet, but I should be able to throw a blade in it and see how she rolls soon.

I need to find a few extra bolts. I’ve got 2 complete sets of cutters, so I should be ready to rumble. I may also move the rosewood fence to my other #45 and add a cherry fence to this one.

– See more at: http://lumberjocks.com/donwilwol/blog/33401#sthash.LgvrnN8i.dpuf

How about a Stanley type 5 #4 restore with some Character?

So seemingly a typical restore, but through the rust and grime I never noticed the break/fix on the rear of the heel. The fix was pretty old and its solid. And the hole, well that’s a mystery. Maybe the owner thought it would help hold the broken tote. Either way, this seems like a nice type 5 #4 with a bunch of character.

WP_003383WP_003384WP_003385WP_003386


I Replaced the transitional cap with a one from a reasonably close vintage. I’ll still need to finds the right iron (cap screw hole in the top) but that’s a minor detail.

Added some cherry wood to dress it up a little.

WP_003387WP_003388WP_003389WP_003390WP_003391WP_003392WP_003393WP_003394WP_003395WP_003396WP_003399

New knob for a Stanley #1

There is a tool dealer I run into almost every flea market I go to. We often spend a lot of time talking tools and he’s help me find new places to pick. He’s really not a woodworker, and he doesn’t restore, just cleans them up typically. He mentioned he had a Stanley #1 that was missing the knob. So I turned him one. Here it is on my #1.

Not really a Handyman #3

This was bought on ebay as a handyman #3

As I started stripping it and as it unfolded I became a bit confused. Having never had a Handyman before, it took a while to sink it. I have what appears to be a type 5 – #3 with a handyman cap and a type 10 or 11 v shaped logo iron. SWEET.

Just find a cap of the right vintage, and now it looks better.

Saving the Stanley #48

After a lot of looking I finally purchased a Stanley #48. As many of you know, I look for the rust. Here is how it came.

WP_001938

WP_001939


So the first thing I did was soak it in evapo-rust. I was hoping the soaking would loosen some of the screws and parts. I had removed the knob before immersing it in the bath.

WP_001941WP_001940

It soaked over night and in the morning I came out looking like this.

WP_001946WP_001945


I took it completely apart and  took to wire brushing all the parts.

WP_001947WP_001952

I hit the brass nut with the buffing wheel.

WP_001950

I then sanded the knob, Starting with 60 grit up through 500.

WP_001951

I laid out the part, sharpened the irons and oiled each piece.

WP_001956

Now I put it all back together.

WP_001957WP_001958

All That is left is trying it out.

WP_001960

After the first run I realized I had the blades in backward. Switched them around and kept on making shavings.

WP_001962WP_001961WP_001963WP_001964WP_001965

One more plane to add to the till.

WP_001966